
How to Understand and Apply the Building Blocks of Reference Architecture (Using Hands-On Brick Modeling)
We hope this guide gives you a fun, hands-on way to grasp a tricky idea~
Reference architecture sounds heavy. It's the kind of phrase that fills slide decks and scares newcomers. But at its heart, it's simple. It's a proven pattern you can reuse, so you don't reinvent the same system every time.
The trouble is that patterns live in documents. They're abstract. People nod along in meetings, then walk away with five different pictures in their heads.
So let's try something different. Let's build the pattern out of bricks.
This guide shows you how to model a reference architecture with physical building blocks. You'll learn to spot the reusable parts, assemble them into a template, and adapt that template for real projects. Whether you're a tech lead, a student, or a hobbyist who loves a good build, we think you'll enjoy this.
Let's get started.
What Reference Architecture Really Means
Before we build anything, let's agree on the idea.
A reference architecture is a blueprint. It captures the best-known way to solve a class of problems. Instead of designing a payment system from scratch, you reach for a reference pattern that others have already tested.
Think of it like a recipe that many cooks have refined over years. You still bring your own touches. But the base is solid, and you skip the early mistakes.
The building blocks of reference architecture are the standard, reusable parts inside that blueprint. Each one has a clear role. Each one can be swapped, reused, or copied into a new design. When you understand these parts, you can assemble almost any system faster and with fewer surprises.
That reusable quality is exactly what makes bricks such a natural teaching tool.
Why Bricks Fit This Idea So Well
A reference architecture is a template, not a finished product. It's meant to be reused and adapted.
Bricks work the same way. A single brick is a small, standard unit. It clicks into other bricks in predictable ways. You can build one design, take it apart, and use the same pieces for a completely different creation.
That's the whole spirit of a reference pattern. Reuse. Consistency. Room to adapt.
At BrickHobby, we design sets for people who love turning ideas into something they can hold. Using bricks to model a system is one of the more creative uses we've come across, and it works beautifully for teaching, planning, and sharing. See more hands-on examples in our architecture building blocks planning guide.
Step 1: Separate the Pattern From the Project
Here's the first mental shift. A reference architecture is not one specific system. It's the shared skeleton behind many systems.
So before you touch a single brick, write down two lists.
List one: the pattern. These are the parts that show up in every version of the system. A gateway. A processing layer. A storage layer. A monitoring piece. These stay the same no matter the project.
List two: the project details. These change every time. The exact vendor. The team names. The specific data. Leave these off your model for now.
The goal here is to capture only the reusable skeleton. That skeleton is your reference architecture. Keep it lean. If a part only appears in one project, it doesn't belong in the pattern.
A quick test for each part
Ask yourself one question about every candidate block: "Would this appear in the next project too?"
If yes, it's part of the pattern. If no, set it aside. This simple filter keeps your model clean and truly reusable.
Step 2: Build a Template Kit of Standard Blocks
Now for the hands-on part. Instead of building a full model right away, build a small kit of standard pieces first.
Think of it like a set of stamps. Each stamp represents one type of block you'll reuse across many designs.
Give each standard block a fixed look. Consistency is what turns loose bricks into a language your whole team can read.
Here's one approach that works well:
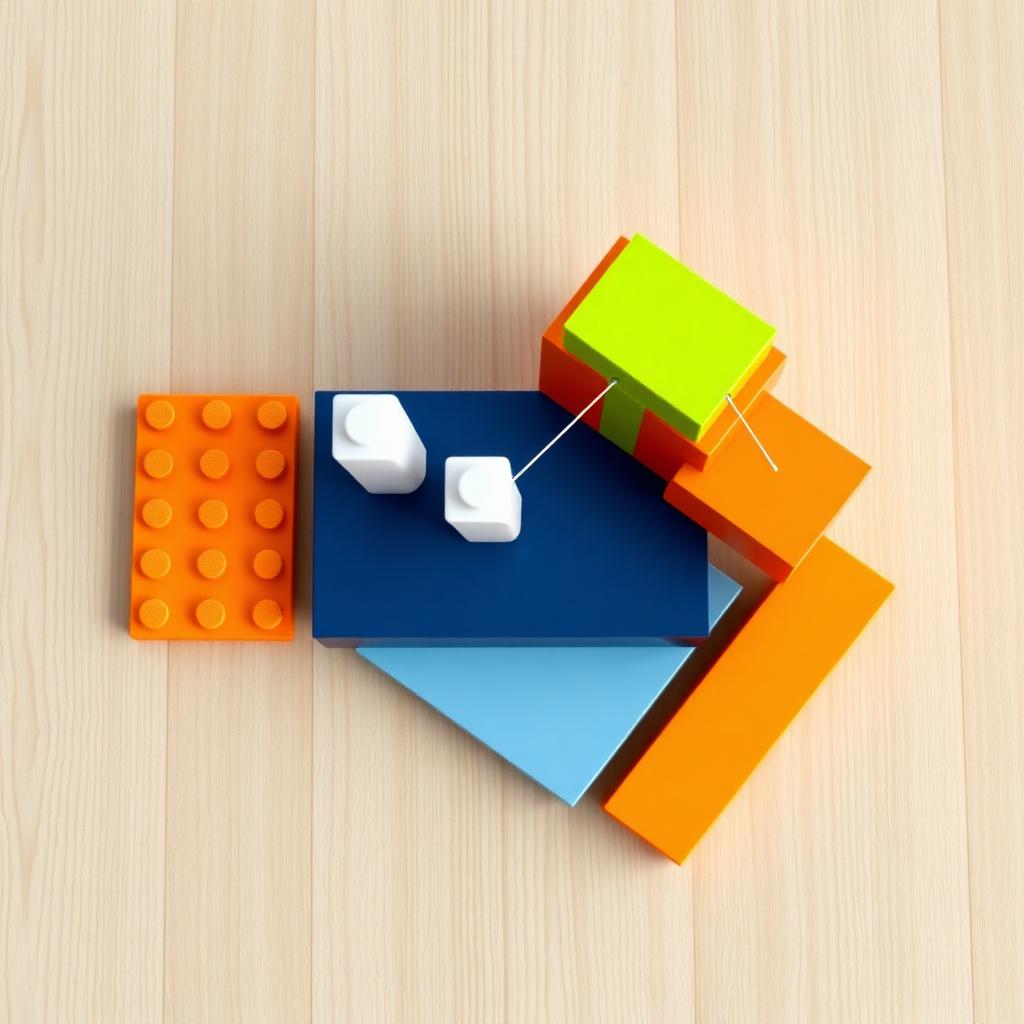
- A gateway block: a single flat plate with a distinct color, say orange. It marks where things enter or leave the system.
- A logic block: a small tower of a second color, say white. It handles the work.
- A data block: a wide, solid base of a third color, say dark blue. It holds information.
- An observability block: a bright, eye-catching piece, say lime green. It watches everything else.
Build several copies of each. Now you have a physical kit of the building blocks of reference architecture, ready to snap into any design you need. For deeper block strategy, see our software architecture building blocks guide.
Keep a legend nearby
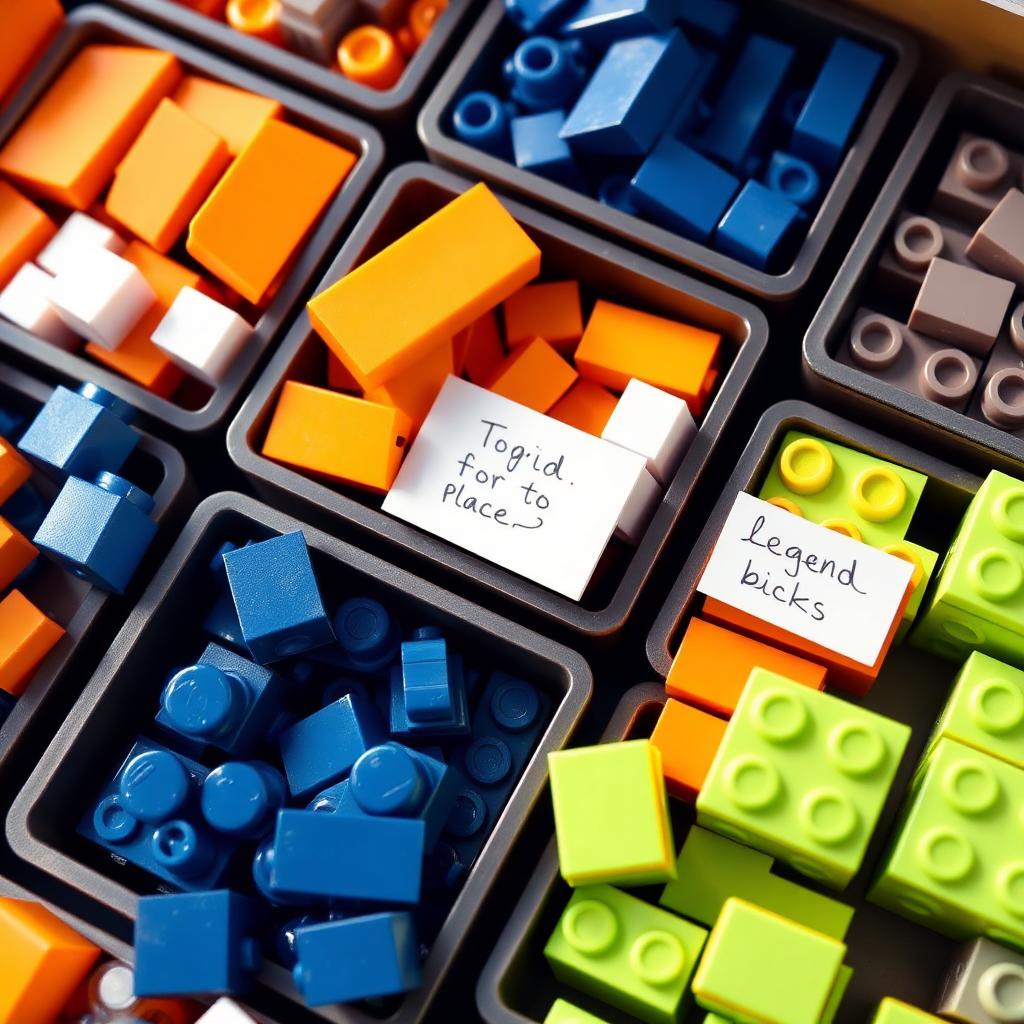
Write your color rules on a small card. Orange means gateway. White means logic. Blue means data. Green means observability.
Keep this card beside your kit. Anyone who joins later can read your models in a minute. That's the point of a reference pattern. It should teach itself.
Step 3: Assemble the Reference Model
With your kit ready, it's time to build the pattern itself.
Lay down a baseplate. This is your canvas. Then place your standard blocks in the shape of the reference architecture you want to capture.
Let's model a common web service pattern as an example:
- Place an orange gateway block on the left edge. This is where requests arrive.
- Snap two white logic blocks next to it. These handle the requests.
- Set a dark blue data block behind the logic blocks. This stores the results.
- Drop a lime green observability block above the whole thing. It watches all the other parts.
Step back and look. You've just built a reference model. It's not tied to any single project yet. It's the reusable pattern, sitting right in front of you.
Show the flow
Now add connectors. Use thin bars or beam pieces to link the blocks in the order data moves through them.
A bar from the gateway to the logic blocks. Another from logic to data. A few thin links from the green block down to everything it monitors.
These connectors turn a static shape into a living map. Anyone can trace a request through the whole system just by following the bars.
Step 4: Adapt the Template for a Real Project
This is where the magic really shows. A reference architecture is meant to be adapted, and bricks make adaptation obvious.
Say your team is starting a new project. You already have the reference model built. Now you tailor it.
Add project-specific pieces. Maybe this project needs a second data store. Snap another blue block in place. The pattern stretches to fit without breaking.
Mark what's different. Use a small, unusual piece to flag anything unique to this project. A single red brick on top of a block says, "This part is custom here." Now everyone sees at a glance where you've strayed from the standard.
Keep the core intact. The beauty of a reference pattern is that the skeleton stays the same. You're decorating a proven frame, not rebuilding from scratch. For enterprise-scale adaptation, our TOGAF building blocks guide maps the same idea onto four TOGAF layers.
Compare two projects side by side
Try this. Build the base reference model once. Then create two adapted versions on separate baseplates.
Put them next to each other. The shared blocks show what your projects have in common. The extra pieces show where they differ.
This is a powerful way to spot patterns across your work. It also helps new team members learn fast.
Step 5: Use the Model to Communicate and Teach
A finished brick model does something a diagram rarely manages. It invites people to touch, point, and ask questions.
Set your model on the table during a planning meeting. Watch what happens. People lean in. They pick up a block and ask what it does. The conversation gets concrete fast.
Here are a few ways to put the model to work:
Onboarding. Hand a new hire the reference model and your legend card. In ten minutes they'll understand the shape of your systems better than a week of reading docs.
Design reviews. When someone proposes a change, have them show it on the model. Lifting out a block and holding up a new one sparks better discussion than a slide ever could.
Teaching students. For anyone learning system design, the physical model removes the fear. They build the pattern with their hands, and the idea sticks. Related reading: enterprise architecture building blocks to plan and communicate.
Step 6: Grow a Library of Reference Models
One pattern is useful. A shelf of patterns is a superpower.
As you model more systems, keep the good ones. Photograph each finished build. Label it clearly. Store your kits in small boxes, one per pattern type.
Over time you'll build a library. A web service pattern here. A data pipeline pattern there. An IoT event-driven pattern beside it. Each one is a ready-made starting point for your next project.
Make it a shared collection
Invite your team to add to the library. When someone solves a new problem well, they build it in bricks and add it to the shelf.
This turns your reference architecture from a document nobody reads into a collection everyone enjoys.
Common Mistakes to Avoid
Even a great method can wobble. Watch for these slips.
Mixing pattern and project. If you clutter the reference model with one project's details, it stops being reusable. Keep the skeleton clean.
Skipping the legend. Without a color key, your model becomes a private code only you understand. Always keep the card visible.
Building too big. A model with hundreds of tiny pieces confuses more than it clarifies. Aim for clarity, not completeness.
Working in isolation. The real value comes when the team builds and discusses together. Don't hide the model in a corner.
Treating it as fixed. Systems evolve. Leave your model easy to rearrange so it can grow with your thinking.
A Simple Checklist to Start This Week
- Write two lists: the reusable pattern and the project-only details.
- Choose a color for each type of standard block.
- Build a kit with several copies of each block.
- Write a legend card and keep it nearby.
- Assemble your first reference model on a baseplate.
- Add connectors to show how data flows.
- Adapt the model for one real project.
- Flag custom parts with a distinct piece.
- Photograph and label the finished model.
- Show it to a colleague and check they understand.
Work through these, and you'll have a working model plus a team that finally shares one clear picture.
Bringing It All Together
Reference architecture doesn't have to stay locked inside dense documents. When you turn a pattern into something you can build, hold, and rearrange, it becomes real for everyone.
Start by separating the reusable pattern from the project details. Build a kit of standard blocks. Assemble the reference model, then adapt it for real work. Use it to teach, to plan, and to spark better conversations. Over time, grow a whole library of patterns you can reach for again and again.
The steps are simple. The payoff is a shared understanding that no slide deck can match.
Explore more in the Architecture & Landmarks category — including our mini building blocks architecture guide and studio-style architecture set guide.
Frequently Asked Questions
What are the building blocks of reference architecture, in plain terms?
They're the standard, reusable parts that make up a proven system pattern. Think of a gateway, a logic layer, a data store, and a monitoring piece. Each one has a clear job and can be reused across many projects.
Do I need a technical background to try this brick method?
Not at all. The approach works even if you've never designed a system before. You just need to name the parts of a pattern and decide how they connect.
How is this different from just drawing a diagram?
A diagram is flat and hard to change on the fly. A brick model invites people to touch it, point at it, and rearrange it in real time.
How many bricks do I need to get started?
Less than you might think. Standard blocks in four or five colors cover most patterns. A baseplate gives you a canvas, and a few thin bars work as connectors.
Can I use this to onboard new team members?
Yes, and it's one of the best uses. Hand a new hire your finished model and a simple legend card. In minutes they'll grasp the shape of your systems better than they would from pages of documentation.
Ready to build this yourself?
BrickHobby sells high-quality LEGO-alternative building block sets — the same brick standard, a fraction of the price. Browse our in-stock sets and simply contact our customer service team to place your order; we will confirm availability, pricing and worldwide shipping for you.
Keep reading

Architecture & Landmarks
Build Impressive Landmarks with Building Blocks Landmark 5 Sets
A hobbyist and family guide to building blocks landmark 5 sets — how to choose, sort, and build display-quality Eiffel Tower, Colosseum, and Taj Mahal models with BrickHobby as a LEGO alternative.
Architecture & Landmarks
How to Build Impressive Structures with Architecture Wooden Building Blocks
A step-by-step guide for hobbyists and families: how to choose a set, plan, sort, and build display-quality architecture models with wooden-style building blocks.
Architecture & Landmarks
How to Build Stunning Architectural Models with ABB Architecture Building Blocks
ABB architecture building blocks let hobbyists turn a love of buildings into display-worthy models. A complete builder's guide — planning, execution, choosing quality bricks, and showcasing the finished piece.