
How to Use Architecture Building Blocks Examples to Plan Your Own Model
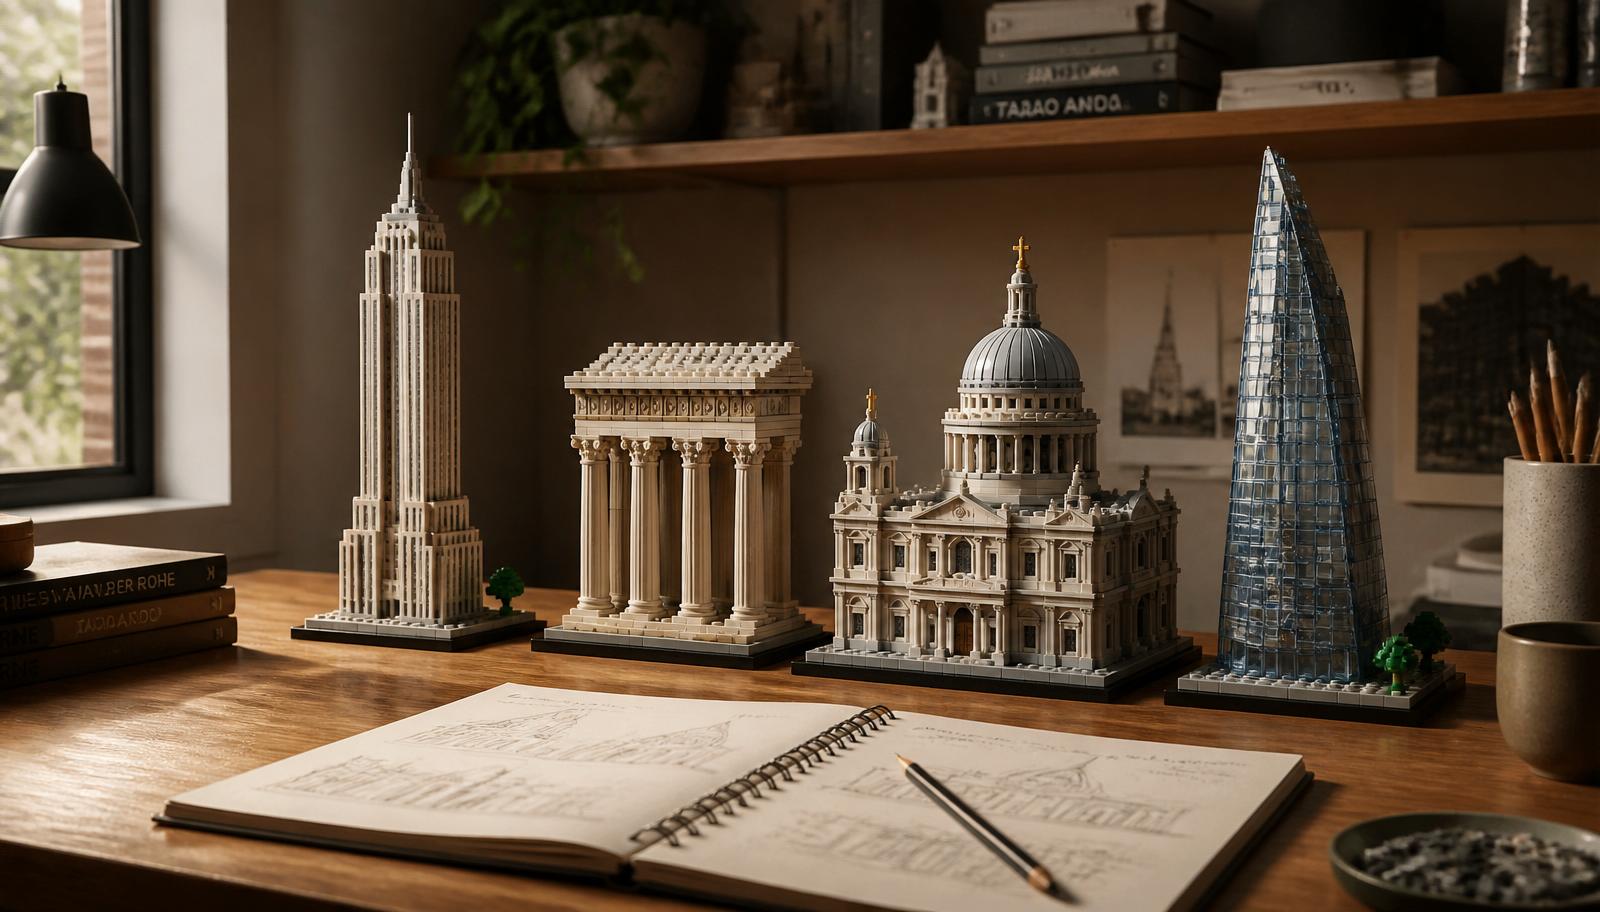
The best builders don't start with bricks. They start with references. Before a single stud clicks into place, they study what already works — the proportions, the techniques, the small details that make a facade feel real.
That's the shortcut this guide unlocks. Studying architecture building blocks examples teaches you faster than any manual. You'll learn to read a model, break it into buildable parts, and translate what you see into your own design.
Here's what you'll get:
- How to source and study strong reference models
- How to break an example into repeatable techniques
- How to translate references into your own build
- How to execute a clean, display-ready model
- Common planning mistakes to skip
Let's start reading the work.
Why Study Examples Before You Build
Reference-first building saves time and bricks. You skip the guesswork and copy proven methods.
Three reasons this approach wins:
- Faster learning. See a technique once, use it forever.
- Fewer teardowns. Proven proportions mean fewer rebuilds.
- Better results. Your first model looks like your tenth.
Architecture is a solved problem in the brick world. Skilled builders have already cracked columns, domes, glass curtain walls, and tiled roofs. Your job is to study their solutions, not reinvent them.
The goal isn't copying. It's understanding. Once you see why a builder angled a wall or offset a row of bricks, you can apply that logic to any structure you dream up. For a systems view of the same idea, see our post on modular building blocks architecture.
Step 1: Source Strong Reference Examples
Good references beat good instructions. Build your library first.
Where to Find Examples
Study a wide range before you commit to a style:
- Official architecture sets. Clean, proven proportions.
- MOC galleries. Creative techniques and custom solutions.
- Community showcases. Real builds with real detail.
- Real buildings. Photos of the structure itself.
Mix all four. A boxed set shows you the "correct" way. A MOC shows you the creative way. The real building shows you the target.
Browse themed architecture sets and study their design choices in the Architecture & Landmarks blog. Even sets you don't buy teach you technique.
What Makes a Good Reference
Not every model teaches well. Look for:
- Clear structural logic. You can see how it holds together.
- Repeatable techniques. Methods you can reuse.
- Honest proportions. Scale that reads as realistic.
- Documented builds. Step photos or process shots.
Save your favorites. Screenshot the details. Build a reference folder before you build anything else.
Mini-summary: Gather examples from sets, MOCs, and real buildings. Prioritize models with clear structure and repeatable methods.
Step 2: Read an Example Like a Builder
Anyone can look at a model. Builders read it. They see the parts, the order, and the tricks.
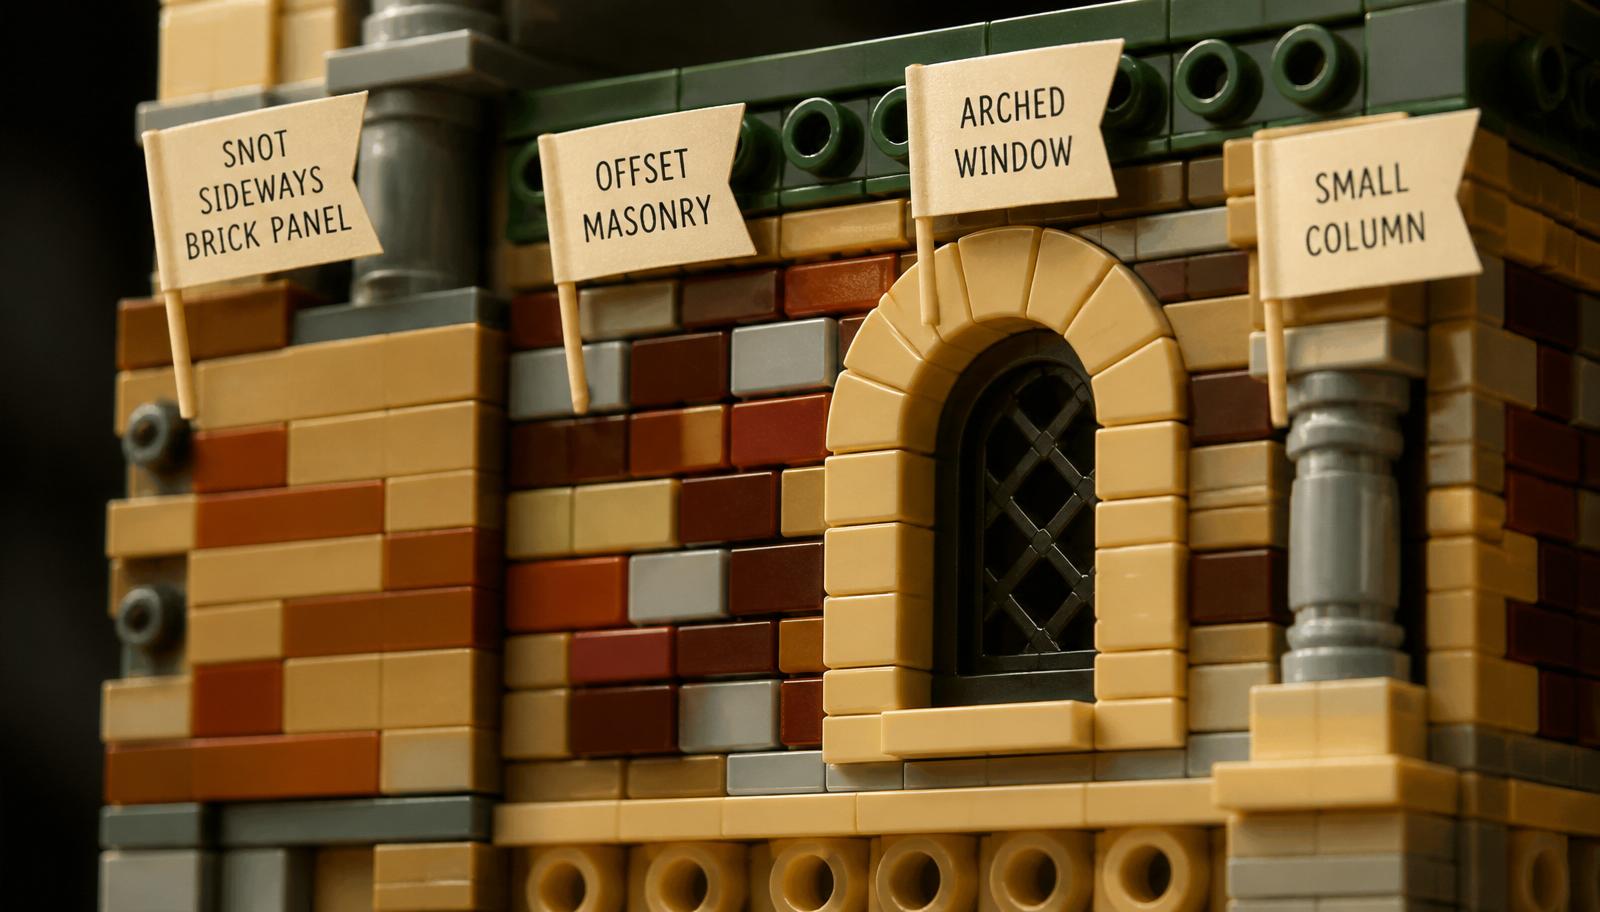
Break It Into Systems
Every architectural build splits into systems. Study each one separately:
- Foundation. Baseplate size and grid alignment.
- Walls. Brick pattern, texture, and offset.
- Openings. Windows, doors, and arches.
- Roof. Slope, tiling, and edge detail.
- Ornament. Columns, cornices, signage, trim.
Look at one system at a time. Ask how the builder solved it. That focused reading is where the real learning happens.
Spot the Techniques
Strong architecture building blocks examples hide clever methods in plain sight. Train your eye to catch them:
- SNOT panels. Studs Not On Top — bricks turned sideways for smooth facades or detail work.
- Offset masonry. Staggered rows that mimic real brickwork.
- Half-plate stacking. Fine height adjustments for realistic proportions.
- Bracket detailing. Small parts used for cornices and trim.
Once you name a technique, you own it. You'll spot it everywhere and use it in your own builds. Micro-scale examples train your eye even faster — see our mini building blocks architecture guide for scale tricks that translate up.
Measure the Proportions
Count the studs. Real architecture lives on ratios. A window three studs wide under a wall ten studs tall reads correctly. Change that ratio and the building looks wrong.
Study how examples handle height, width, and spacing. Note the numbers. Those proportions transfer directly to your design.
Mini-summary: Split each model into systems, name the techniques, and count the proportions. Reading beats copying.
Step 3: Choose Your Own Subject
Now turn analysis into direction. Pick what you want to build.
Pick a Building Type
Match ambition to skill:
- Beginner. Cottage, storefront, small chapel. 400–800 PCS.
- Intermediate. Townhouse, clock tower, train station. 1,000–2,500 PCS.
- Advanced. Cathedral, skyscraper, landmark. 3,000+ PCS.
Match Style to Technique
Your reference study now pays off. Different styles need different methods:
- Modern. Glass curtain walls. Heavy on transparent bricks and SNOT.
- Classical. Columns and symmetry. Bracket and profile work.
- Gothic. Arches and spires. Slope and cheese-slope detailing.
- Industrial. Brick and steel. Offset masonry and grille tiles.
Choose a style where you've already studied the techniques. You'll build faster and cleaner.
Compare architecture-themed sets by style and piece count across the Architecture & Landmarks category to anchor your design in a proven base.
Mini-summary: Pick a subject that matches your skill, then choose a style you've already researched.
Step 4: Translate Reference Into Design
This is the bridge between studying and building. Turn your references into a plan.
Sketch the Footprint
Start with the baseplate. Decide the grid first:
- 32x32 studs. Single small structure.
- 48x48 studs. Building plus grounds.
- Joined plates. Full landmark or complex.
The footprint anchors everything. Lock it before you build up.
Block Out the Massing
Massing is the building's basic shape before detail. Rough it out in plain bricks first. No windows, no trim — just the volumes.
This step catches proportion errors early. Fix a squat tower now, not after you've detailed it.
Plan the Detail Layer
With massing solid, layer in the techniques you studied:
- Wall texture. Apply your offset or SNOT method.
- Openings. Frame windows and doors at studied ratios.
- Roof system. Build the slope and tiling.
- Ornament. Add columns, cornices, and trim last.
Adapt, Don't Copy
Combine methods from several architecture building blocks examples into one design. Take a wall technique from one, a roof from another, proportions from a third. That remix is where your original work begins. Enterprise architects use the same remix logic — our TOGAF architecture building blocks post is a fun crossover read.
Mini-summary: Sketch the footprint, block the massing, then layer detail. Combine techniques to make the design yours.
Step 5: Execute a Clean Build
A good plan still needs clean execution. These habits separate a display piece from a shelf-filler.
Build in Sub-Assemblies
Construct sections separately, then join them:
- Base and foundation as one unit.
- Each wall as its own panel.
- Roof built off-model, lowered on last.
Sub-assemblies keep complex builds stable and let you fix errors in isolation.
Reinforce as You Rise
Tall structures need internal strength:
- Overlap plates at corners for rigidity.
- Add internal bracing on towers and spires.
- Anchor heavy roofs to load-bearing walls.
Keep Proportions Honest
Check your build against your reference constantly. Step back every few stages. Compare the silhouette. Straight walls, even gaps, and correct ratios read as quality.
Detail With Restraint
Real buildings aren't cluttered. Place ornament where it belongs — cornices at the roofline, columns at the entrance. Restraint reads as realism.
Mini-summary: Build in sub-assemblies, reinforce as you rise, and check proportions against your reference at every stage.
Step 6: Display Your Finished Model
An architectural build is a display piece. Stage it to match the effort.
Choose the Setting
- Open shelf. Shows detail from all angles.
- Enclosed case. Protects fine ornament from dust.
- Rotating base. Displays every facade in turn.
Light It Right
Lighting transforms architecture:
- Warm interior LEDs for lived-in windows.
- Uplighting to emphasize columns and facades.
- UV-filtering glass to protect against fading.
Add Context
A small base — paving, steps, a tree line — grounds the model. Keep it simple. The building stays the star.
For scene-scale inspiration in the same vein, our rap architecture building blocks model guide shows how these same techniques carry over to urban dioramas.
Insider Tips From Experienced Builders
A few habits separate a flat replica from a model that impresses.
- Study three examples per project. One for walls, one for roof, one for proportions.
- Photograph your reference at build height. Match your eye line to the model's.
- Keep a technique journal. Note every method you spot and where you used it.
- Prototype tricky sections. Test an arch or dome before committing it to the build.
- Vary window states. Some lit, some dark. Uniform reads as fake.
Studying architecture building blocks examples rewards patience. The details you notice on your fifth read are the ones that make your build stand out. Teachers can use the same reference-first flow — see our architecture building blocks toy teaching guide for classroom-ready variants.
The community accelerates all of this. Builders share technique breakdowns, proportion tricks, and reference libraries daily. Post your work, ask for feedback, and pull ideas from creators worldwide.
Common Planning Mistakes to Avoid
Skip these and your build comes out cleaner.
Skipping the reference stage. Building blind leads to teardowns. Study first.
Detailing before massing. Ornament on wrong proportions wastes hours. Block the shape first.
Copying one example exactly. A straight copy isn't your work. Combine and adapt.
Ignoring proportions. Wrong ratios sink an otherwise clean build. Count the studs.
Overloading ornament. Cluttered facades read as fake. Detail with restraint.
No baseplate plan. No anchored grid means misaligned sections. Lock the footprint first.
Avoid these six and every architectural build comes out display-ready.
Your Planning Checklist
Quick-reference plan before you start:
- Gather references from sets, MOCs, and real buildings
- Read each example by system — walls, roof, openings, ornament
- Name the techniques and count the proportions
- Pick a subject and style you've researched
- Sketch the footprint, block the massing, layer detail
- Build in sub-assemblies and check against your reference
- Light it, base it, and share it with the community
Start Planning Your Build Today
Great architectural models begin with great research. Study strong architecture building blocks examples, read them like a builder, and translate what you learn into your own design. The techniques are already proven. Your job is to understand them, remix them, and execute with care. Ready to scale the idea further? Our cloud architecture building blocks data center build shows the same discipline applied to a very different subject.
Your action plan:
- Study three references per project
- Read each by system, not as a whole
- Block massing before detail
- Adapt techniques rather than copy them
- Build clean, display proud, share with the community
Pick your subject, open your reference folder, and start planning. Your best build starts with study.
Frequently Asked Questions
Where can I find good architecture building blocks examples to study?
Pull from four sources: official architecture sets for proven proportions, MOC galleries for creative techniques, community showcases for real-world detail, and photos of actual buildings for your target. Study a wide range before committing to one style. Save the details that impress you in a reference folder, and revisit them at each build stage.
Do I need to copy an example exactly to get a good result?
No. Copying teaches technique, but original work comes from combining methods. Take a wall technique from one model, a roof from another, and proportions from a third. This remix approach turns study into your own design. The goal is understanding why a technique works, so you can apply it to any structure.
How do I keep proportions realistic in my build?
Count the studs on your references and note the ratios. Real architecture lives on proportion — window width to wall height, floor spacing, roof pitch. Block out your massing in plain bricks first, then check the silhouette against your reference before adding detail. Fixing proportions early saves hours of rebuilding later.
What's the best first architecture project for a beginner?
Start with a small, single structure in the 400–800 piece range — a cottage, storefront, or small chapel. Choose a style where you've already studied the techniques. Build in sub-assemblies, check your proportions against a reference, and add ornament with restraint. Work up to towers and landmarks once the basics feel natural.
How do I display a finished architectural model?
Use an open shelf to show detail from every angle, or an enclosed case to protect fine ornament from dust. Light interiors with warm LEDs and use uplighting to emphasize columns and facades. Keep models out of direct sunlight, or use UV-filtering glass to prevent fading. Add a simple base to ground the build without stealing focus.
Ready to build this yourself?
BrickHobby sells high-quality LEGO-alternative building block sets — the same brick standard, a fraction of the price. Browse our in-stock sets and simply contact our customer service team to place your order; we will confirm availability, pricing and worldwide shipping for you.
Keep reading

Architecture & Landmarks
Build Impressive Landmarks with Building Blocks Landmark 5 Sets
A hobbyist and family guide to building blocks landmark 5 sets — how to choose, sort, and build display-quality Eiffel Tower, Colosseum, and Taj Mahal models with BrickHobby as a LEGO alternative.
Architecture & Landmarks
How to Build Impressive Structures with Architecture Wooden Building Blocks
A step-by-step guide for hobbyists and families: how to choose a set, plan, sort, and build display-quality architecture models with wooden-style building blocks.
Architecture & Landmarks
How to Build Stunning Architectural Models with ABB Architecture Building Blocks
ABB architecture building blocks let hobbyists turn a love of buildings into display-worthy models. A complete builder's guide — planning, execution, choosing quality bricks, and showcasing the finished piece.